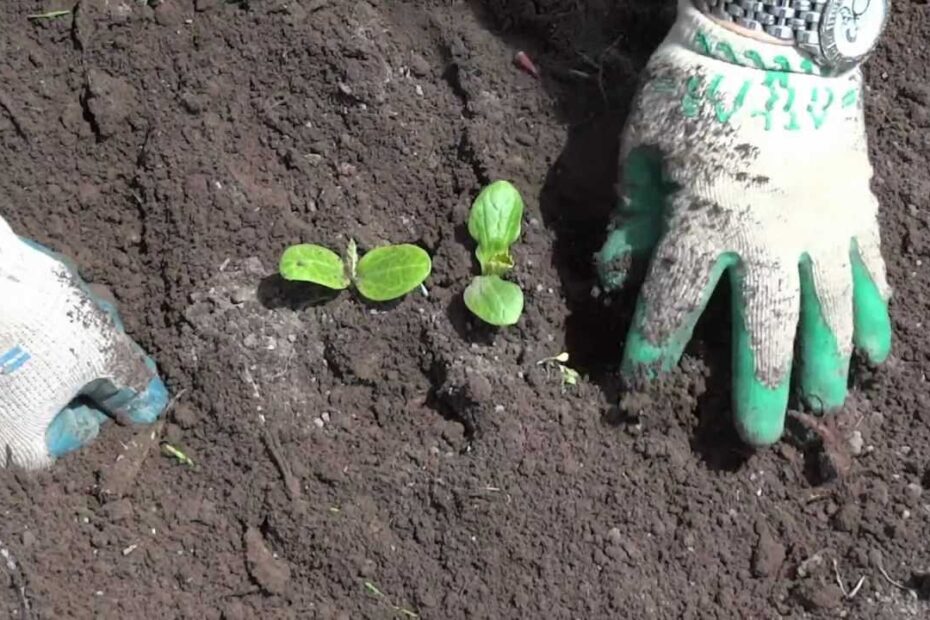
In the lush and vibrant world of gardening, there is something truly magical about witnessing a tiny seedling grow into a flourishing plant. And among nature’s many charismatic shapes, none quite captivate the heart like the mighty squash. Whether it’s the sunny yellow of a summer squash or the robust orange hue of a winter variety, these versatile plants never fail to bring joy to the garden and dinner table alike. But to unveil their true potential, sometimes a squash needs a little help to spread its roots in a new home. In this article, we invite you on a horticultural adventure, as we unravel the secrets and techniques of transplanting squash with finesse and grace. So, grab your gardening gloves and let us set forth on a journey to ensure your squash plants thrive, no matter where life takes them.
Preparing the Ground for Transplanting Squash
Transplanting squash can be an exciting way to grow these delicious vegetables in your own backyard. Before you begin the transplanting process, it’s crucial to prepare the ground adequately to ensure healthy and thriving squash plants. By taking the time to properly prepare the soil and create an ideal environment for your transplants, you’ll increase your chances of a bountiful harvest. Here are some essential steps to follow when prepping the ground for transplanting squash:
1. Clear the area:
Start by clearing the area where you plan to transplant your squash. Remove any weeds, rocks, or debris that may hinder the growth of your plants. Clearing the ground will provide a clean slate for your squash to establish its root system.
2. Amend the soil:
Squash plants thrive in well-draining soil rich in organic matter. Before transplanting, amend the soil with compost or well-rotted manure to improve its fertility. This will provide the necessary nutrients for the plants to grow vigorously.
| Features | Tips |
|---|---|
| 1. Proper spacing: | Ensure each plant has enough space to spread its leaves and grow without overcrowding. |
| 2. Mulching: | Apply a layer of organic mulch around the base of the transplants to suppress weeds and retain moisture. |
| 3. Watering: | Provide regular watering to keep the soil consistently moist but not waterlogged. |
By following these steps and incorporating the suggested features and tips, you’ll give your transplanted squash the best possible start. With proper care and attention, you’ll soon be delighting in the flavors of your own homegrown squash!”

Practical Steps for Transplanting Squash Seedlings
Transplanting squash seedlings can be a rewarding experience that leads to a bountiful harvest of delicious summer squash. To ensure a successful transplant, it is important to follow a few practical steps that will help the seedlings thrive in their new environment.
Preparing the Seedlings
Before transplanting, it is crucial to prepare the squash seedlings properly. Here are some key steps to follow:
- Gently remove the seedlings from their original containers, taking care not to damage the delicate roots.
- Loosen the roots slightly to encourage outward growth and prevent potential root-bound issues.
- Water the seedlings a day before transplanting to ensure they are well-hydrated.
- Choose a well-drained location in your garden that receives ample sunlight for the squash to thrive.
n id="Transplanting_Techniques">Transplanting Techniques
When it comes to transplanting squash seedlings, the following techniques will help promote growth and protect against transplant shock:
- Dig a hole in the prepared garden bed that is slightly larger and deeper than the root ball of each seedling.
- Gently place the seedling into the hole, ensuring the top of the root ball is level with the soil surface.
- Backfill the hole carefully, firming the soil gently around the base of the seedling. Avoid compacting the soil too tightly.
- Water the transplanted seedlings immediately and keep the soil consistently moist, but not waterlogged.
Tips for Success
Consider the following tips to maximize your success in transplanting squash seedlings:
<th>Feature/Tips| Description | |
|---|---|
| Timing | Wait until after the last frost date in your area to ensure the soil is warm enough for the seedlings. |
| Spacing | Provide adequate spacing between each seedling to allow for proper air circulation and prevent overcrowding. |
| Fertilization | Apply a balanced organic fertilizer to boost growth and provide necessary nutrients for healthy plants. |

Essential Care Guidelines for Newly Transplanted Squash
Transplanting squash can be an exciting endeavor, but it requires careful attention and nurturing to ensure successful growth. Follow these essential care guidelines to give your newly transplanted squash the best chance at thriving:
1. Timing is Everything
- Choose a sunny location for your squash plants, ensuring they receive at least 6-8 hours of direct sunlight daily.
- Transplant your squash seedlings after the last frost date for your region to avoid cold damage.
- Make sure the soil temperature is above 60°F (15°C) for optimum growth.
2. Tender, Loving Care
- Water your newly transplanted squash immediately after planting, ensuring the soil is consistently moist but not waterlogged.
- Apply a layer of mulch around the base of the plants to help retain moisture, deter weeds, and regulate soil temperature.
- Regularly monitor squash leaves for signs of pests or diseases, promptly treating any issues that may arise.
3. Features & Tips
| Feature | Tip |
|---|---|
| Pruning | Remove excessive foliage to improve air circulation and prevent disease. |
| Pollination | Hand-pollinate the flowers if you notice a lack of bees or other pollinators in your garden. |
| Support | Consider providing a trellis or stake for vining squash varieties, helping to save space and prevent fruit rot. |
By following these guidelines and experimenting with different squash varieties, you’ll soon be harvesting your own delicious and bountiful squash crop. Happy transplanting!
Ensuring Success: Tips for Transplanting Squash Seedlings
Squash seedlings can be delicate and require proper care during the transplantation process to ensure their healthy growth and ultimate success in your garden. Here are some valuable tips and techniques for successfully transplanting squash seedlings:
-
Timing is everything: Wait until all danger of frost has passed before transplanting your squash seedlings. This will ensure that they are not exposed to any sudden drops in temperature, which could stunt their growth or even lead to their demise.
- Choose the right location: Squash plants love sunlight and warmth, so select a site in your garden that receives at least six to eight hours of direct sunlight daily. Additionally, ensure that the soil is well-draining to prevent waterlogged roots, which can cause rotting.
-
Prepar
e the soil in advance: Prior to transplanting, prepare the soil by adding organic matter such as compost or well-decomposed manure. This will improve the soil’s fertility and drainage, providing a nutrient-rich environment for your squash seedlings to thrive.
In the table below are some crucial features and additional tips to consider when transplanting squash seedlings:
| Feature/Tips | |
|---|---|
| Watering | Water the seedlings thoroughly before transplanting to ensure they are well-hydrated. |
| Spacing | Allow enough space between each squash plant to encourage proper airflow and prevent overcrowding. |
| Mulching | Apply a layer of mulch around the base of the seedlings to retain moisture, suppress weed growth, and regulate soil temperature. |
Transplanting squash seedlings can be a rewarding experience, and by following these tips and considering the features mentioned, you’ll provide your plants with a strong foundation for growth and productivity. Enjoy watching your squash thrive and relish in the abundance of delicious, homegrown produce!
Frequently Asked Questions
Q: Can I transplant squash without hurting its tender roots?
A: Absolutely! Think of it as giving your squash plant a gentle root makeover. With proper care and know-how, you can transplant squash without causing any root-related drama.
Q: What is the best time to transplant squash and see it flourish?
A: Timing is key when it comes to a successful squash transplant. Wait until the danger of frost has passed and the soil has warmed up to a cozy 60°F (15°C). Spring or early summer is usually the sweet spot for ensuring your squash transplant takes root and thrives.
Q: How can
I ease the transition of my squash plant into its new home?A: Treat your squash plant like a VIP during the transplant process. Firstly, prep the new spot by loosening and enriching the soil. Then, gently dig up your squash seedling, making sure to preserve its precious roots. Finally, give your greens some TLC by planting them at the same depth as they were before and showering them with water to reduce transplant stress. Your squash will be ready to shine in its new digs! As your gardening journey winds down, we hope this guide on how to transplant squash has planted a seed of inspiration within you. From the moment you delicately cradled those precious seedlings to the exhilarating act of giving them a new home, this process is an ode to both resilience and growth.
As you bid farewell to these little green darlings, remember that nurturing them goes beyond mere soil and water. It’s an intimate dance between nature and nurture, with your hands as the conductors of this harmonious symphony. Through your careful tending, each squash plant will reach its full potential, cascading with an abundance of vibrant, golden fruits.
With each new transplant, your confidence in your own green thumb will only deepen. The excitement of discovering those first tender blossoms will forever fuel your imagination. As delicate tendrils curl and extend, so too will your love for the exquisite beauty and boundless potential in every sprouting plant.
Like true h
orticultural artists, we understand that transplanting is not merely an act, but an artform. It requires patience, tenderness, and a pinch of scientific understanding. So, dear gardeners, always be gentle as you take your squash plants from pot to patch, delicately unveiling their roots to a world of endless possibilities.As you gaze upon your thriving squash garden, filled with life and potential, take pride in knowing that you played a vital role in their journey. Together, you have nurtured these tender beings, allowing them to flourish and bring joy to your home and those around you.
So go forth, fellow gardeners, and continue your horticultural exploits with the wisdom gained from this humble guide. Transplanting squash is a small step towards a bigger, greener world, reminding us that growth is a universal language understood by both plants and humans alike.
May your fu
ture squash transplants be abundant, your harvests plentiful, and your love for nature evergreen.- When to Put Weed and Feed on Lawn in Michigan - October 16, 2023
- When to Fertilize Potatoes Plants - October 16, 2023
- Can You Plant Clover in the Spring - October 16, 2023

