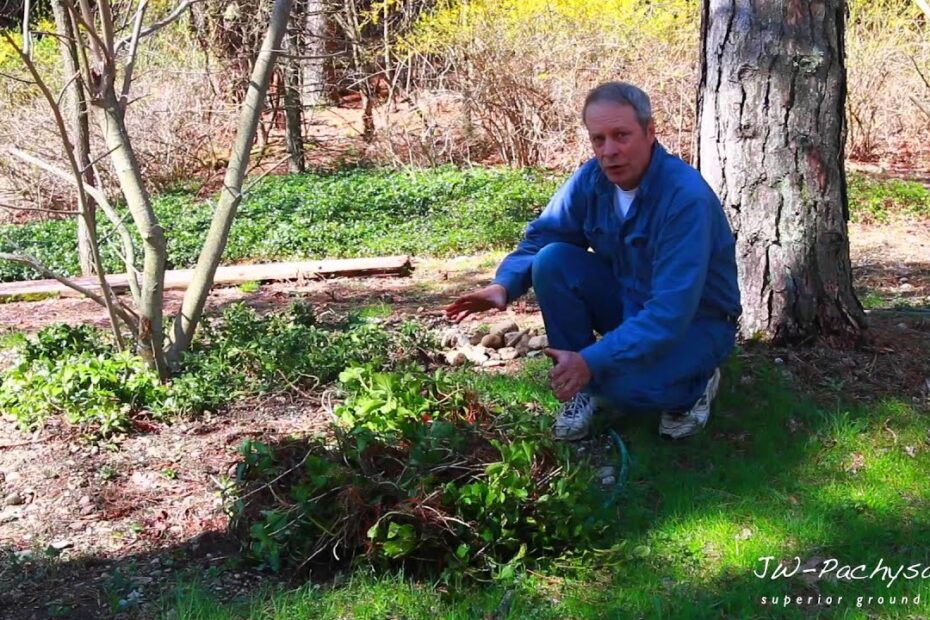
Welcome to a world where green thumbs unleash their superpowers and transform mundane spaces into lush oases. Today, we embark on a journey to discover the secrets of transplanting Pachysandra, the unsung hero of the plant kingdom. Steeped in history, this resilient evergreen groundcover has long been celebrated for its ability to endure harsh conditions and flourish in the most unlikely places. As we delve into the art of uprooting and relocating this verdant wonder, let us unlock the realm of possibilities and uncover the magical techniques behind successfully transplanting Pachysandra. So, tie up your gardening gloves and equip yourself with patience, for with the right knowledge and a touch of finesse, we will unravel the mysteries of Pachysandra transplantation together.
Choosing the Right Time and Location for Transplanting Pachysandra
When it comes to transplanting pachysandra, selecting the right time and location is crucial for ensuring its successful growth and adaptation in its new environment. Pachysandra, with its glossy evergreen leaves and ability to thrive in shade, is a popular choice for ground cover. However, there may be instances where you need to relocate it to a different spot in your garden or yard. Follow these tips to choose the perfect timing and location for transplanting pachysandra:
Timing:
- Early spring or early fall is the ideal time to transplant pachysandra. This allows the plant to establish itself before the extreme temperatures of summer or winter hit.
- Avoid transplanting during periods of excessive heat or freezing temperatures to minimize stress on the plant.
- Transplanting pachysandra during its dormant phase can increase its chances of survival.
Location:
- Choose a new location that mimics the conditions in which pachysandra naturally thrives, preferably in partial shade or full shade.
- Ensure the soil in the new location is well-draining to prevent waterlogging, which can harm the roots.
- Consider the proximity to other plants and the spacing requirements of pachysandra. This will prevent overcrowding and allow each plant to receive adequate sunlight and nutrients.
| Feature/Tips | Description |
|---|---|
| Watering | Keep the transplanted pachysandra well-watered for the first few weeks until it establishes roots in its new location. |
| Mulching | Apply a layer of organic mulch around the pachysandra to retain moisture and suppress weed growth. But remember, keep the mulch a few inches away from the base of the plant to prevent rot. |
| Fertilizing | Avoid fertilizing immediately after transplanting as it may stress the plant. Wait for a few months before applying a balanced slow-release fertilizer. |
By carefully considering the timing and location of transplanting pachysandra, you can ensure its smooth transition and promote its healthy growth for years to come.

Ensuring Proper Preparation and Care for Transplanting Pachysandra
If you’re planning to transplant pachysandra, it’s important to ensure proper preparation and care to give these robust groundcovers the best chance at thriving in their new location. Before you begin the transplanting process, consider the following tips and features to ensure a successful transition:
| Features and Tips: | |
|---|---|
| Location Assessment: | Conduct a thorough evaluation of the new site’s soil conditions, sunlight availability, and drainage to verify it is suitable for pachysandra growth. |
| Timing: | Transplant pachysandra during cooler seasons, preferably in early spring or late fall, when the plants are less stressed and can establish themselves before the extremes of summer or winter. |
| Preparation: | Start by saturating the soil around the pachysandra with water a day or two before transplanting to ease the removal process. Remove any weeds or debris that may hinder growth. |
Once you’ve considered these key aspects, follow the necessary steps for a successful transplant: Dig a generous hole at the new planting site, ensuring it’s wide and deep enough to accommodate the pachysandra’s root system. Gently lift the pachysandra clump from its current location, aiming to keep the root ball intact. Carefully transfer the clump into the prepared hole, ensuring the top of the root ball is level with the surrounding soil. Fill the hole with a mix of compost and native soil, firming it gently around the roots to eliminate air pockets. Finally, water the transplanted pachysandra thoroughly to promote proper root establishment.

Step-by-Step Guide to Successfully Transplanting Pachysandra
Pachysandra, with its glossy evergreen leaves and delicate white flowers, is a popular ground cover that can add beauty and lushness to any landscape. Whether you are looking to expand your existing patch of pachysandra or simply relocate it to a new area, transplanting this plant can be a rewarding and successful endeavor. Here’s a step-by-step guide to help you navigate the process and ensure the health and vitality of your pachysandra.
First and foremost, it is important to choose the right time to transplant your pachysandra. Spring or fall are the best seasons, as they provide optimal conditions for the roots to establish themselves in their new location. To begin, dig a new hole in the desired area that is large enough to accommodate the root ball of the pachysandra. Carefully remove the plant from its current location, taking care to preserve as much of the root system as possible.
Once the pl
ant is removed, gently place it in the prepared hole, making sure it is level with the surrounding ground. Fill the hole with a mixture of well-draining soil, compost, and organic matter, and lightly tamp it down to eliminate any air pockets. Water the transplanted pachysandra thoroughly, ensuring that the roots are well-soaked. To promote healthy growth, it is recommended to mulch around the plant to retain moisture and suppress weed growth. Regularly watering the newly transplanted pachysandra, especially during dry spells, will help it become established in its new home. With proper care and attention, your pachysandra will thrive in its new location, enhancing the beauty of your garden or landscape for years to come.Here are some additional features and tips to consider when transplanting pachysandra:
| Feature | Description |
| Choose healthy plants | Ensure the pachysandra you are transplanting is free from diseases or pests. |
| Prep the soil | Prepare the new planting area by amending the soil with organic matter to improve drainage and nutrient content. |
| Monitor watering | Regularly check the moisture levels and adjust watering accordingly, keeping the soil moist but not waterlogged. |
These simple steps and helpful tips will give you the confidence to successfully transplant your pachysandra, allowing it to flourish in its new surroundings. With a little patience and care, you can enjoy the lush, vibrant beauty of pachysandra in any corner of your garden.

