Reviving the monotonous hum of your beloved mower after a long winter’s rest can evoke feelings of joy and excitement. Yet, as with any mechanical contraption, a faulty starter can often dampen the spirit and delay the triumphant return to a neatly manicured lawn. Testing a mower starter may seem like a daunting task, reserved only for those with an intimate understanding of the mechanical realm. However, fear not! In this article, we will embark on a journey of discovery, uncovering the mysteries of mower starters, and equipping you with the knowledge to confidently diagnose and troubleshoot any issues that may arise. So, grab your toolbox, don your investigative hat, and let’s unravel the enigma of mower starter testing, one click at a time.
Understanding the Basics of Mower Starters
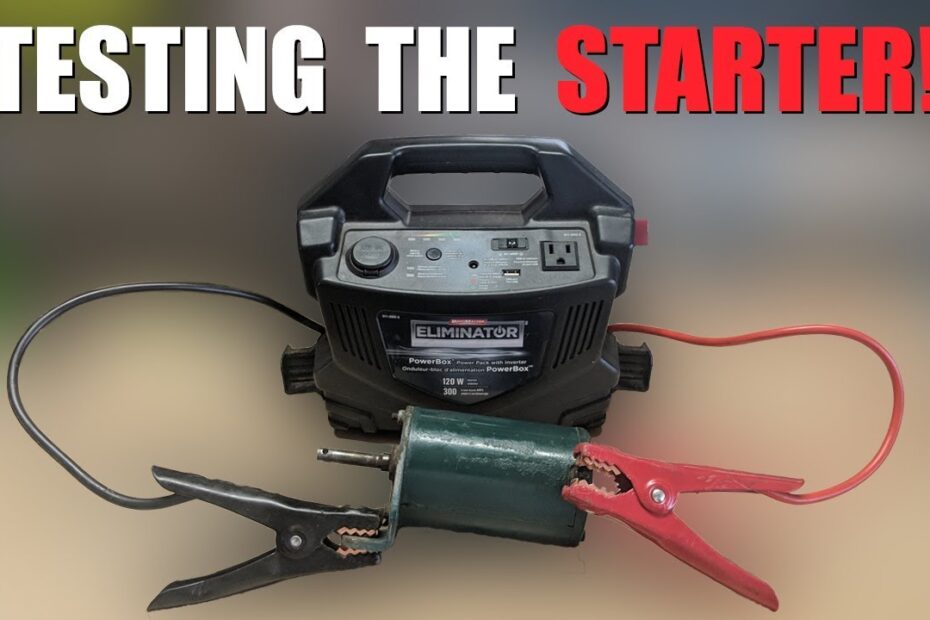
A crucial component of any mower is its starter, as it kick-starts the engine with a jolt of electricity. Understanding how to test a mower starter is essential for troubleshooting and ensuring its optimal functionality. Here are some handy tips and steps to help you diagnose any issues with your mower starter and fix them promptly.
One of the simplest ways to test a mower starter is by conducting a visual inspection. Look for any loose connections or frayed wires that may be hindering its operation. Additionally, check if the starter is securely mounted and free from any debris or dirt that could impede its performance. If any issues are detected, tighten the connections or clean the starter carefully using compressed air or a soft brush. It’s vital to ensure that all the connections are tight and the wires are in good condition before moving on to the next step.
Another method to test your mower starter is by performing a voltage check. Use a multimeter to measure the voltage outputs at different points of the starter circuit. First, disconnect the spark plug wire from the spark plug to prevent accidental engine starts. Then, connect the multimeter leads to the positive and negative terminals of the starter motor. Turn the ignition key to the “start” position and check if the multimeter displays a voltage reading. If the voltage readings are significantly lower than the specified range, it’s a clear indication that your mower starter needs to be repaired or replaced. Remember to consult your mower’s user manual or manufacturer’s guidelines for specific voltage ranges and other technical specifications.
Here is a table highlighting some essential features or tips to keep in mind when testing a mower starter:
    <table style="width:100%">
      <tr>
        <th>Feature</th>
        <th>Description</th>
      </tr>
      <tr>
        <td>Visual Inspection</td>
        <td>Check for loose connections, frayed wires, and cleanliness of the starter</td>
      </tr>
      <tr>
        <td>Voltage Check</td>
        <td>Measure voltage outputs using a multimeter to diagnose any issues</td>
      </tr>
      <tr>
        <td>Consult User Manual</td>
        <td>Refer to the mower's manual for specific guidelines and technical specifications</td>
      </tr>
    </table>
By following these methods and , you can effectively troubleshoot and resolve any issues that may arise. Remember to exercise caution and employ proper safety measures during the testing process. Happy mowing!


Common Signs of a Faulty Mower Starter
A faulty mower starter can be a frustrating problem to deal with. It can leave you scratching your head trying to figure out why your mower won’t start. But fear not, there are some common signs that can help you determine if your mower starter is the culprit. By understanding these signs, you can save time and money by diagnosing the issue yourself before resorting to calling a professional.
One of the most obvious signs of a faulty mower starter is when you hear a clicking sound when you turn the key. This indicates that the starter is not engaging properly and is struggling to crank the engine. Another sign to watch out for is if your starter motor is spinning too slowly or not at all. This could mean that the starter brushes are worn out or that there is a problem with the solenoid. Additionally, if you notice a burning smell or see smoke coming from the starter, it is a clear indication that something is wrong and it needs to be replaced immediately.
To further assist you in troubleshooting your mower starter, here are some features and tips to keep in mind:
| Feature | Tip |
|---|---|
| If the starter motor is not spinning at all | Check the battery connections and voltage to ensure it has enough power to engage the starter. |
| If the starter motor is spinning too slowly | Inspect the starter brushes to see if they are worn out or if there is excessive dirt and debris that is impeding their movement. |
| If there is a clicking sound when turning the key | Check the solenoid for any loose connections or damage. |
By familiarizing yourself with these common signs and following the provided tips, you can become a pro at testing and troubleshooting your mower starter. Remember, a little bit of knowledge can go a long way in saving you time and money when it comes to repairing your mower. So roll up those sleeves and get your mower back to its starting glory!
Step-by-Step Guide to Testing a Mower Starter
To effectively test a mower starter, follow these step-by-step instructions. First, ensure that the mower is on a flat, stable surface and the engine is turned off. Safety should always be a top priority when working with machinery. Inspect the starter by visually examining it for any obvious signs of damage or loose connections. Check for frayed wires, corroded terminals, or worn-out components. If any issues are detected, it may be necessary to repair or replace the starter before proceeding.
Next, gather the necessary tools for testing the mower starter. You will need a multimeter, a set of wrenches, and a safety glove. Once you have the tools ready, remove the starter from the mower. Refer to the manufacturer’s manual or search for online tutorials specific to your mower model for guidance on how to safely detach the starter. Place the starter on a clean, non-conductive surface such as a wooden table or workbench.
Now it’s time to conduct the actual tests on the mower starter. Use the multimeter to check for continuity by setting it to the resistance or ohms function. Connect the multimeter leads to the corresponding terminals on the starter. A reading of zero or close to zero indicates that the starter has good continuity. On the other hand, a high resistance or infinite reading suggests a faulty starter that requires repair or replacement. Remember to follow the multimeter instructions carefully to obtain accurate results.
In addition to the testing process, here are some important features and tips to keep in mind while assessing your mower starter:
| Features/Tips | Description |
|---|---|
| Easy Installation | Look for a starter that offers hassle-free installation, allowing you to quickly replace a faulty one. |
| Durable Construction | Opt for a starter made of high-quality materials to ensure longevity and reliability. |
| Compatibility | Check if the starter is compatible with your specific mower make and model to avoid any compatibility issues. |
By following this step-by-step guide and considering the important features and tips mentioned above, you can effectively test your mower starter and ensure optimal performance of your equipment. Remember to prioritize safety throughout the testing process and consult a professional if you encounter any difficulties or uncertainties.
Essential Tips for Efficiently Troubleshooting Mower Starters
One of the most frustrating experiences for any homeowner is trying to start their mower, only to find that the starter is not working. It can be a time-consuming and expensive problem to fix, but with a little troubleshooting, you may be able to save yourself some money and get your mower back up and running in no time. Here are some .
Firstly, check the battery. A dead or weak battery is often the culprit behind a malfunctioning starter. Use a multimeter to test the battery voltage. If it reads below 12.6 volts, it may need to be charged or replaced. Additionally, inspect the battery terminals for any corrosion or loose connections. Clean the terminals with a wire brush and tighten any loose connections to ensure a secure electrical connection.
Next, examine the solenoid. The solenoid is responsible for transmitting electrical current from the battery to the starter motor. If the solenoid is faulty, the starter motor may not receive the necessary power to function properly. Inspect the solenoid for any visible damage or signs of wear. If it appears worn or damaged, it may need to be replaced. Additionally, use a continuity tester to check the solenoid’s connections. If the tester fails to indicate continuity, it indicates a problem with the solenoid.
| Features/Tips | Description |
|---|---|
| Inspect the spark plug | Remove the spark plug and inspect it for any signs of wear or damage. If the electrode is heavily corroded or coated in carbon deposits, it may need to be replaced. |
| Check the ignition switch | If the ignition switch is faulty, it may prevent the starter from engaging. Test the ignition switch for continuity using a multimeter. If it fails the test, consider replacing it. |
| Verify the fuel supply | Ensure that there is enough fuel in the tank and that it is free from contaminants. A clogged fuel filter or a dirty carburetor can also prevent the mower starter from functioning efficiently. |
By following these essential tips, you can efficiently troubleshoot mower starters and potentially solve any issues without having to rely on professional help. Remember to always prioritize safety while troubleshooting, and if the problem persists or seems too complex, don’t hesitate to seek assistance from a qualified technician.
Frequently Asked Questions
Q: Why is it important to test a mower starter?
A: Ah, the heart of a mower – the starter! It’s crucial to ensure your mower’s starter is in tip-top shape to avoid those dreaded “why won’t it start?” moments. Here’s how to test that trusty friend.
Q: How can I test a mower starter?
A: Fear not, the test of the starter awaits! First, detach the spark plug wire, then use a multimeter to check the resistance of the starter. No clue what that means? No worries! We’ll guide you through the process step by step.
Q: What should I do if my mower starter fails the test?
A: Oh no, your starter didn’t pass with flying colors! Don’t despair – there’s still hope. Start by checking the battery, making sure it’s adequately charged. Next, examine the connections between the battery and starter for any pesky loose or corroded wires. If all else fails, a trip to the local mower guru might be in order. Together, we’ll get that starter roaring back to life! And there you have it – a guide to helping you navigate through the world of mower starter testing. We’ve covered everything from the basic principles to the step-by-step process, empowering you to troubleshoot with confidence. Remember, a well-maintained starter is the key to a smoothly running mower, so don’t shy away from giving it a little TLC when needed. By understanding the components, identifying potential issues, and putting our handy tips into practice, you’ll no longer be left scratching your head when faced with a stubborn starter. So go ahead, put your skills to the test and get that mower roaring to life in no time. Happy mowing!

- When to Put Weed and Feed on Lawn in Michigan - October 16, 2023
- When to Fertilize Potatoes Plants - October 16, 2023
- Can You Plant Clover in the Spring - October 16, 2023