Unleashing the green thumb within is akin to unveiling a secret world of delectable aromas, flavors, and healing wonders. For those who have embarked on nurturing their own kitchen herb garden, the gentle art of repotting is a precious skill that ensures a thriving garden kingdom. So, whether you are a seasoned gardener seeking a refresher or a novice adventurer stepping into the verdant realm for the very first time, we invite you to join us as we delve into the enchanting journey of repotting herbs. In this guide, we shall uncover the secrets of seamless transplants, bask in the glory of flourishing foliage, and empower you to nurture a vibrant herbal empire. Ready your hands, dust off your gardening gloves, for we are about to embark on a horticultural odyssey where roots find new homes and dreams of herbaceous splendor take root.
Choosing the Right Container for Repotting Herbs
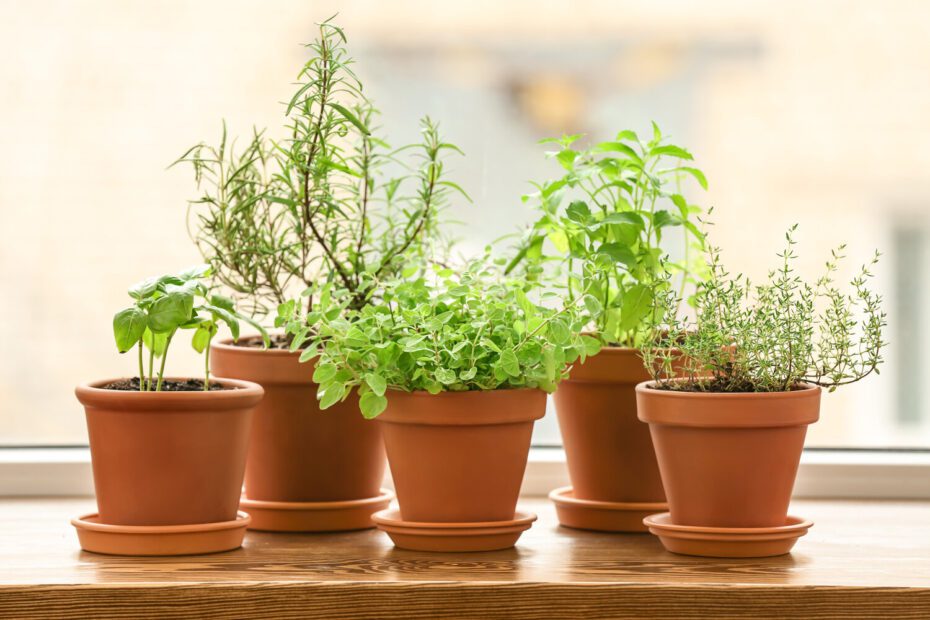
When it comes to repotting your beloved herbs, choosing the right container is key. Not only does it affect the growth and health of your herbs, but it also adds a touch of style to your kitchen or garden. With so many options available, it can be overwhelming to select the perfect container. But fear not, we’ve got you covered! Here are a few tips and features to consider when choosing the ideal container for repotting your herbs.
| Features | Tips |
|---|---|
| Size: | Ensure that the container is spacious enough to accommodate the root system of your herbs. A too-small container can hamper their growth. |
| Drainage: | Opt for a container with drainage holes to save your herbs from overwatering. This will prevent root rot and keep them thriving. |
| Material: | Consider using clay or terra cotta pots as they provide better breathability for the herbs’ roots. They also add a rustic charm to your space. |
Additionally, you may want to choose a container that matches the aesthetic of your kitchen or garden. If you have limited space, hanging baskets or vertical herb gardens can be a great option. Don’t forget to label your herbs too, to avoid any confusion when you’re cooking up a storm. With these tips and features in mind, you’ll be well on your way to finding the perfect container to repot your herbs and enjoy fresh flavors all year round!

Preparing the Soil Mix for Optimal Herb Growth
To achieve optimal herb growth, it is crucial to prepare the right soil mix when repotting your herbs. The soil mix provides essential nutrients, supports root development, and promotes healthy plant growth. Here are some key tips to help you create the perfect soil mix for your herbs:
-
Choose the right potting soil: Opt for a high-quality potting soil that is well-draining and rich in organic matter. This will provide a balanced environment for your herbs to thrive.
-
Add compost for nutrients: Incorporating compost into your soil mix is a great way to enrich it with essential nutrients. Compost not only improves soil fertility but also enhances its water-retaining capacity.
-
Optimize drainage: Herbs prefer well-drained soil, so ensure that your soil mix has proper drainage. Adding perlite or coarse sand to the mix can improve drainage and prevent the soil from becoming compacted.
-
Consider pH levels: Different herbs have varying pH preferences. For instance, most herbs prefer slightly acidic soil with a pH range of 6.0 to 7.0. Adjust the pH of your soil mix accordingly to meet the specific needs of your herbs.
Creating a balanced soil mix is essential for the successful growth of your herbs. Remember to monitor the moisture levels of the soil, provide adequate sunlight, and regularly fertilize to ensure your herbs thrive in their new pots. Happy repotting!

Repotting Herbs: Step-by-Step Guide
Repotting herbs is a crucial step in their growth journey, ensuring that they continue to flourish and provide you with fresh flavors for your culinary creations. To make the process seamless, here’s a handy step-by-step guide that will take your herb repotting skills to the next level!
First and foremost, choose the right pot size for your herbs. Opt for a container that is approximately one to two inches wider and deeper than the current pot. This will provide enough space for the roots to spread and establish themselves. Additionally, make sure the pot has drainage holes to prevent waterlogged soil.
Next, caref
ully remove the herb from its current pot, gently loosening the soil around its roots. Be cautious not to damage the delicate stems or leaves. Once the herb is free, shake off any excess soil and inspect the roots for any signs of damage or diseases.Now, it’s time to prepare the new pot for your herb’s new home. Fill the bottom of the pot with a layer of quality potting mix, ensuring it is evenly spread. Then, place the herb into the pot, making sure it sits at the same depth as it originally did. Fill the sides of the pot with more potting mix, gently pressing it down as you go to eliminate any air pockets. Give the herb a good watering to settle the soil and promote root growth.
To make the most out of your herb repotting experience, consider these tips and features:
| Feature/Tips | Description |
|---|---|
| Adequate Sunlight | Herbs thrive in a sunny location, so choose a spot that receives 6-8 hours of sunlight each day. |
| Regular Pruning | Prune your herbs regularly to encourage bushier and healthier growth. |
| Watering Guidelines | Ensure the soil remains consistently moist but not waterlogged. Stick your finger into the soil, and if it feels dry up to the first knuckle, it’s time to water. |
Remember, repotting herbs is a rewarding task that will not only nurture their growth but also enhance your culinary adventures. So grab your favorite herbs, follow this step-by-step guide, and let your green thumb flourish!
Tips for Caring for Newly Repotted Herbs
Caring for newly repotted herbs can be a daunting task, but with the right guidance, it can also be a rewarding and enjoyable experience. Here are some useful tips to help you successfully repot your precious herbs and ensure their healthy growth.
-
Choose the right pot: When repotting herbs, opt for a pot that is slightly larger than their current one. This allows their roots to spread comfortably. Additionally, make sure the pot has proper drainage holes to prevent waterlogged soil.
- Use high-quality potting mix: Herbs thrive in well-draining soil, so select a potting mix specifically formulated for herbs or vegetables. This ensures that the plants receive the necessary nutrients and adequate airflow. Avoid using regular garden soil, as it tends to become compacted in pots.
-
Provid
e adequate sunlight: Most herbs require at least six hours of direct sunlight daily. Place your newly repotted herbs in a sunny spot, like a window sill or balcony, where they can soak up the sun’s rays. If sunlight is limited, consider using a grow light to supplement their lighting needs.
| Feature/Tips | Description |
|---|---|
| Watering | Proper watering is crucial for herbs. They prefer slightly moist soil, so water them when the top inch becomes dry. |
| Pruning | Regular pruning promotes bushier growth and enhances the flavor of the herbs. Trim the tips regularly for a healthier plant. |
| Fertilizing | To nourish your herbs, use a water-soluble organic fertilizer once every two weeks during their growing season. |
In conclusion, repotting herbs is a fantastic way to refresh their environment and ensure their longevity. By following these tips and providing the right conditions, you’ll be rewarded with thriving, aromatic herbs for all your culinary adventures. Happy repotting!
pan id="Frequently_Asked_Questions">Frequently Asked Questions
Q: Can I give my herbs a fresh start in a new home?
A: Absolutely! Repotting is like giving your herbs a mini makeover. It helps them thrive by providing more room for their roots to sprawl and soak up essential nutrients. So, get those gloves on and let’s get repotting!
Q: When should I consider repotting my herbs?
A: It’s time to unleash your green thumbs when your herbs start feeling cramped in their current pots. Look for signs like roots peeking out from drainage holes, stunted growth, or if the soil dries out too quickly. Trust your instincts and give your herb buddies a more spacious and comfortable living environment.
Q: How can I ensure a smooth transition for my herbs?
A: Ah, the key to successful herb repotting is to be gentle, my friend. Begin by selecting a new pot that’s slightly larger than your herb’s current one. Next, gently loosen the plant’s roots from the soil, being careful not to damage them. Pop your herb into its new home with fresh, nutrient-rich soil, and give it a loving drink of water. Remember, a little TLC goes a long way in helping your herbs adjust to their new digs! As we bring this repotting journey to a close, let us revel in the undeniable satisfaction that comes from nurturing our herb companions. We have ventured deep into the intricacies of repotting, unearthing the secrets that ensure their growth and prosperity.
From select
ing the ideal pot to gently easing their roots into a new abode, we have witnessed the delicate dance between patience and diligent care. Today, dear reader, you have become an honorary horticulturist, armed with wisdom to undertake this magnificent feat on your own.As we bid farewell to the world of tangled roots and cramped containers, we invite you to embark on this repotting quest with newfound confidence and grace. Ponder upon the myriad possibilities that lie within the vibrant green foliage of your cherished herbs, ready to bring life and flavor to your culinary creations.
Remember, the repotting process is not merely an act of necessity, but a transformative ritual that fosters growth, enables resilience, and sparks rebirth. In the art of cultivating herbs, we find ourselves connected to the ebb and flow of nature, a harmony that whispers secrets of life’s fragrant tapestry.
So, dear re
ader, may you embark on your repotting journey armed not just with soil and shears, but with a heart attuned to the subtle symphony within your herb garden. Allow the transfer of these delicate beings to symbolize the untapped potential within each of us, ready to burst forth with newfound energy and zest.As you witness your herbs flourishing in their new homes, remember the patience bestowed upon them, and let it be a reminder that life’s transformations are often slow, but profoundly rewarding. Let us revel in the simple joy of growth and immerse ourselves in the beauty of this humble act of gardening.
Go forth, dear reader, and may your herb garden thrive as a testament to your dedication, and may you find solace and fulfillment among the aromatic wonders that nature so graciously endows upon us. Farewell, until our paths cross again amidst the green splendor of future endeavors.

- When to Put Weed and Feed on Lawn in Michigan - October 16, 2023
- When to Fertilize Potatoes Plants - October 16, 2023
- Can You Plant Clover in the Spring - October 16, 2023