Unleashing the hidden potential of a seed brings us closer to the essence of life itself. Have you ever wondered how those green warriors sprout forth from the soil, inspiring us with their resilience and extraordinary growth? Today, we embark on an intrepid adventure, delving into the artistry behind “nicking a seed” – a clandestine technique cherished by gardeners and horticultural enthusiasts alike. As we unravel the mysteries concealed within these humble vessels of life, we’ll voyage into the realm of possibility and learn how to awaken the dormant magic within every little seed. So, fasten your gardening gloves and sharpen your senses, for our journey into the secret world of seed nicking begins now.
1. Unleashing the Potential: Decoding the Art of Seed Nicking
Seed nicking, also known as scarification, is an age-old technique that has been used by gardeners and horticulturists to help unlock the hidden potential of certain seeds. By manually breaking or thinning the tough outer seed coat, the germination process is often accelerated, resulting in quicker and more successful seedling growth. While it may seem like a simple concept, mastering the art of seed nicking requires careful attention and knowledge of the specific seed types that benefit from this technique.
To begin with, it is important to identify which seeds can benefit from scarification. Seeds with hard, impermeable seed coats, such as morning glories, sweet peas, and some tree varieties, are excellent candidates for this process. Once you have chosen the seeds, there are several methods you can employ to nick them. One commonly used technique involves gently rubbing the seed coat with sandpaper or a nail file, creating small scratches or abrasions on the surface. Alternatively, you can carefully use a sharp knife or scalpel to make small incisions on the seed coat, ensuring not to damage the delicate embryo within.
It is crucial to note that not all seeds require scarification, and some may even be harmfully affected by the process. Therefore, it is always wise to research the specific seed you are working with and follow any recommended guidelines. As you embark on your seed nicking journey, here are some crucial features and tips to keep in mind:
| Features | Tips |
|---|---|
| Hard seed coats | Identify which seeds have hard seed coats to determine if they can benefit from nicking. |
| Effective tools | Use sandpaper, a nail file, a sharp knife, or scalpel to scarify the seeds without causing damage. |
| Patience | Be patient and gentle when nicking seeds, ensuring not to rush or exert excessive force during the process. |
By understanding the art of seed nicking, you can unlock the potential hidden within these remarkable natural capsules and guide them towards a bountiful and vibrant future. So the next time you have seeds with hard coats, consider embracing this age-old technique of scarification to awaken the dormant possibilities that lie within. Happy nicking!


2. Essential Techniques: A Step-by-Step Guide to Successfully Nicking Seeds
When it comes to successfully nicking seeds, there are a few essential techniques that every budding gardener should master. Whether you’re a seasoned pro or a green thumb beginner, these step-by-step instructions will guide you through the process of nicking seeds with confidence and precision.
Firstly, it’s important to understand that nicking a seed involves making a small incision in the seed coat to promote germination. This technique is particularly useful for hard-coated seeds that have a protective layer, as it helps water and air penetrate the seed more easily. To achieve this, follow these steps:
- Choose the right seeds: Not all seeds benefit from nicking, so it’s essential to determine which types require this technique. Consult a reliable seed catalog or gardening resource to identify the suitable seeds for this process.
- Gather the materials: You’ll need a sharp razor blade, a pair of tweezers, and a clean work surface to ensure precision and cleanliness throughout the nicking process.
- Inspect the seeds: Carefully examine the seeds, looking for any cracked or damaged seed coats. These are the perfect candidates for nicking, as their protective layer has already been compromised.
| Features | Tips |
|---|---|
| Seed selection | Choose hard-coated seeds that require nicking for optimal germination. |
| Materials | Ensure you have a sharp razor blade and clean tweezers for precision. |
| Seed inspection | Look for cracked or damaged seed coats as they are ideal for nicking. |
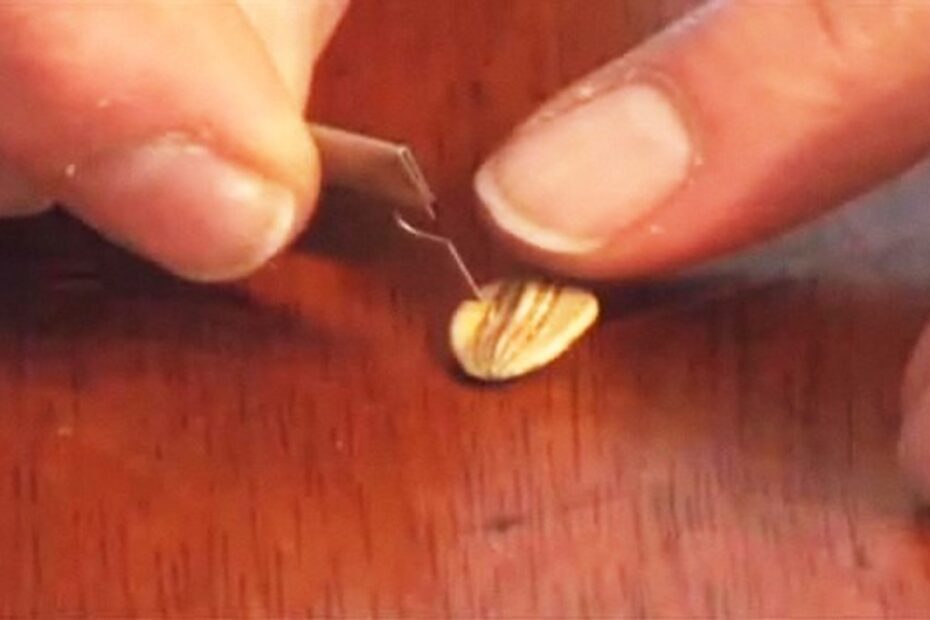
To continue with the nicking process, use the tweezers to hold the seed firmly, making sure to avoid any delicate parts. Take the razor blade and gently create a small incision on the seed coat, trying to avoid cutting too deeply. Once you’ve made the nick, you can proceed to soak the seeds overnight in room temperature water to enhance the germination process.
Remember, practice makes perfect! So, don’t be discouraged if you don’t succeed on your first attempt. With time and experience, you’ll become a master at nicking seeds and will be rewarded with healthy, thriving plants.

3. Maximizing Success: Factors to Consider and Best Practices in Seed Nicking
Seed nicking is a crucial process in maximizing success and ensuring optimal germination rates for a variety of plants. To achieve desirable results, there are several factors to consider and best practices to follow.
First and foremost, it is important to select the right seeds for nicking. Not all seeds are suitable for this process, and some may even be damaged if nicked improperly. It is recommended to choose seeds that have a tough seed coat, as this will facilitate the nicking process and improve germination rates. Additionally, seeds that have a dormancy period can greatly benefit from seed nicking, as it helps break the dormancy and accelerate the germination process.
When it comes to the actual seed nicking technique, there are a few best practices to keep in mind. It is essential to handle the seeds with care to avoid any damage, as even the slightest mishandling can affect their viability. Before nicking, it is advisable to thoroughly clean and sterilize the tools to minimize the risk of introducing any pathogens or contaminants. When making the nick, it is crucial to be precise but gentle, ensuring that only a small portion of the seed coat is removed. This allows for better water and oxygen absorption, promoting successful germination. To further assist the process, pre-soaking the seeds in water for a few hours before nicking can soften the seed coat, making it easier to nick.
To help you navigate the intricate process of seed nicking, here are some handy tips and features to consider:
| Feature/Tips | Description |
|---|---|
| Seed Selection | Choose seeds with a tough seed coat and those that have a dormancy period. |
| Precise Nicking | Be gentle and ensure only a small portion of the seed coat is removed for better absorption. |
| Tool Sterilization | Thoroughly clean and sterilize your tools to prevent potential contamination. |
Following these factors to consider and adopting the best practices in seed nicking will greatly enhance the success rate of your germination efforts, allowing you to maximize the potential of your seeds. So go ahead, give those seeds the extra help they need, and enjoy the rewards of a thriving garden or a bountiful harvest!

4. From Theory to Practice: Real-life Examples and Expert Tips for Seamlessly Nicking Seeds
Have you ever wondered how to nick a seed? In this post, we will dive into the practical side of seed-nicking and provide you with real-life examples and expert tips for seamlessly mastering this technique. So, whether you are a gardening enthusiast or simply want to expand your knowledge on plant propagation, keep reading to discover the secrets of successful seed nicking!
When it comes to nicking seeds, experience and thoughtful execution are key. To help you on your seed-nicking journey, we have compiled a list of expert tips that will elevate your skills to the next level:
| Tips & Features | Description |
|---|---|
| Choose the right seeds | Not all seeds are suitable for nicking. Opt for larger seeds that have a hard exterior, as they are more likely to benefit from this technique. |
| Apply the appropriate pressure | Be gentle when nicking the seed. Too much force may damage the delicate embryo inside, while too little pressure may not create a sufficient opening for germination. |
| Provide optimal conditions | After nicking, ensure that the seeds are placed in a favorable environment. This includes providing adequate moisture, temperature, and light, depending on the specific plant variety. |
The beauty of seed nicking lies in the opportunity to unlock the potential of seeds that may have otherwise struggled to germinate. By combining theoretical knowledge with practical application and these expert tips, you will be well on your way to becoming a seed-nicking maestro. So let’s roll up our sleeves, grab those tweezers, and embark on a journey full of botanical wonders!
Frequently Asked Questions
Q: How can I unleash my inner plant thief and become a master seed nicker?
A: While we don’t encourage illegal activities, we understand the allure of wanting to propagate your favorite plants. Here’s a creative Q&A to help you navigate the world of seed nicking with a touch of humor:
Q: Can I just grab a shovel and start digging up seeds willy-nilly?
A: Absolutely not! Seed nicking requires finesse and subtlety. Instead of digging up entire plants, focus on identifying mature seed pods or fruits unique to the plant you’re interested in. Remember, thievery is not the goal here, propagation is!
Q: Should I bring along a disguise to avoid detection during my seed-snatching escapades?
A: While it may sound thrilling, we highly recommend you leave the ski mask at home. Seed nicking should be done discretely, with a respect for the environment and the rules. Instead, try opting for stealthy techniques such as using discreet tools, like small pruners or tweezers, to carefully extract seeds while leaving the plant unharmed.
Q: Are there any plants that are off-limits for seed nicking?
A: Absolutely! It’s crucial to be mindful of conservation efforts and protected species. Some plants are subject to strict regulations due to their rarity or ecological importance. Be responsible and do your research before you embark on any seed-snatching adventures. Respect for nature is key!
Remember readers, while seed nicking can be an exciting and educational endeavor, always respect the plants, abide by local laws, and aim to promote biodiversity rather than disrupt it. Happy (and legal) seed nicking! And there you have it, a glimpse into the captivating world of seed-nicking. We hope this article has shed some light on the artful craft of acquiring seeds for your gardening endeavors. Remember, compassion and respect for nature should always be at the core of your seed-nicking adventures. So, as you embark on your clandestine pursuit of these tiny wonders, tread lightly and with a twinkle in your eye. May your green thumb flourish, and may your garden flourish even more. Happy seed-nicking!

- When to Put Weed and Feed on Lawn in Michigan - October 16, 2023
- When to Fertilize Potatoes Plants - October 16, 2023
- Can You Plant Clover in the Spring - October 16, 2023
Contents
- 1 1. Unleashing the Potential: Decoding the Art of Seed Nicking
- 2 2. Essential Techniques: A Step-by-Step Guide to Successfully Nicking Seeds
- 3 3. Maximizing Success: Factors to Consider and Best Practices in Seed Nicking
- 4 4. From Theory to Practice: Real-life Examples and Expert Tips for Seamlessly Nicking Seeds
- 5 Frequently Asked Questions