A gentle breeze glides through the vibrant petals, the symphony of buzzing bees surrounds you, and the earthy fragrance engulfs your senses. Ah, the cherished haven of a backyard garden, where the seeds of imagination blossom into a tapestry of colors. But alas, life often prompts us to pick up our roots and replant ourselves elsewhere. Fear not, fellow green thumbs! In this article, we unveil the secrets on how to gracefully relocate your beloved raised garden bed. So buckle up those gardening gloves and let us explore the art of preserving nature’s kaleidoscope as we embark on this horticultural adventure together.
Understanding the Importance of Preparation
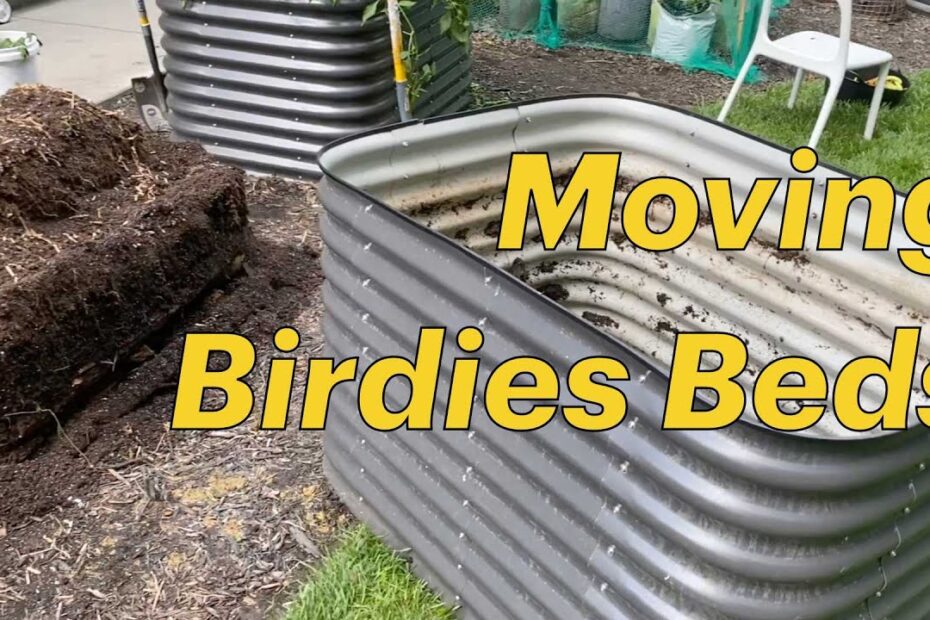
Moving a raised garden bed can be quite a daunting task, but with proper preparation, it can be a breeze. Preparing yourself and your garden bed for the move is essential to ensure a successful relocation.
Firstly, assess the condition of your raised garden bed. Look for any loose boards or damaged areas that may need repair before moving. Reinforcing the structure will help prevent any mishaps during the relocation process. Additionally, remove any plants, soil, or mulch from the bed to make it easier to handle and lighter in weight.
Next, gather the necessary tools and materials for the move. This may include a wheelbarrow, a shovel, a staple gun, and a tarp to protect the plants and soil during transportation. Having these items readily available will save you time and make the moving process more efficient.
In order to lift and move the raised garden bed, it is important to recruit a strong helper or two. Moving the bed on your own can be both physically challenging and potentially hazardous. With a helper, you can evenly distribute the weight and avoid straining your back or injuring yourself.
When it comes to actually moving the bed, start by emptying the soil onto the tarp. This will lighten the load and make it easier to transport. Carefully disassemble the bed, making note of how each piece fits together. Take pictures or label the pieces if necessary to ensure a smooth reassembly later on.

Once the bed has been disassembled, load the individual pieces onto the wheelbarrow or another suitable transportation device. Use caution and take breaks as needed to avoid overexertion. Finally, transport the bed to its new location and begin the process of reassembling and refilling it with soil.
By taking the time to properly prepare and plan for the move, you can ensure the safe relocation of your raised garden bed. Remember to enlist the help of a sturdy companion, disassemble the bed with care, and transport it using suitable equipment. With these preparations in place, your garden bed will be ready to thrive in its new home!
Table:
| Features | Tips |
|---|---|
| Built-in drainage system | Ensure that the drainage system is clear and functioning properly before moving the bed. |
| Sturdy construction | Inspect the bed for any loose or weak spots, reinforcing them if necessary. |
| Lightweight and portable | Empty the soil from the bed to make it easier to lift and transport. |

Choosing the Right Tools and Equipment for the Task
Moving a raised garden bed can be a challenging task, but with the right tools and equipment, you can make it a breeze. Here are some essential items you should consider using to successfully relocate your garden bed:
First and foremost, you’ll need a sturdy shovel or spade to loosen the soil around the edges of the garden bed. This will make it easier to lift the bed without damaging the plants or roots. A long-handled shovel will provide better leverage, especially if your raised garden bed is filled with heavy soil.
Next, consider using a garden trolley or wheelbarrow to transport your raised garden bed to its new location. These handy tools allow you to move the bed without putting strain on your back or causing unnecessary damage. Opt for a trolley or wheelbarrow with large, pneumatic tires to navigate various terrains effortlessly.
To ensure the safety of your plants during the move, it’s crucial to have some burlap or landscape fabric on hand. Wrap the plants carefully in the fabric, securing it with twine or zip ties if necessary, to protect them from excessive jostling or exposure to the elements.
When you reach your new desired spot, make sure to have a level tool at hand to ensure your garden bed is positioned correctly. A level will help you determine if the bed is straight and even, preventing any future drainage or stability issues.
Additionally, consider having a bag of compost mixed with topsoil available to replenish the bed once it’s in its new location. This mix will provide essential nutrients and promote healthy plant growth.
Remember to always prioritize safety when moving a garden bed. Wear gloves and sturdy footwear to protect your hands and feet from potential injuries. By using the right tools and equipment, you can make the process of moving your raised garden bed a seamless and successful endeavor.
Step-by-Step Guide to Safely Transferring your Raised Garden Bed
Moving a raised garden bed may seem like a daunting task, but with a step-by-step guide, it can be done easily and safely. Whether you’re relocating your garden bed to a new spot in the backyard or bringing it with you during a move, this guide will ensure that your plants and structure remain intact.
Before beginning the transfer process, it’s important to prepare and gather the necessary tools and materials. These may include a shovel, garden gloves, a tarp or plastic sheet, a wheelbarrow, and plant-friendly ties or cords. Once you have everything ready, follow these steps:
| Features | Tips |
|---|---|
| Plan the new location for your garden bed. | Water your plants thoroughly a day before moving. |
| Clear the area around the garden bed. | Securely tie up any overhanging branches or foliage. |
| Dig around the perimeter of the bed to loosen the soil. | Avoid transferring during the hottest parts of the day. |
Once you have safely moved your raised garden bed to its new location, make sure to provide extra care and attention to your plants as they may experience temporary shock. Water them regularly and shield them from direct sunlight until they adjust to their new surroundings. By following these steps and being mindful of your plants, your beloved garden bed can continue to thrive in its new home.
Ensuring Successful Reinstallation and Care after Moving
Moving a raised garden bed can be a daunting task, but with proper care and planning, you can ensure a successful reinstallation in your new space. Taking the time to prepare your garden bed for the move and following a few key steps will help minimize stress on your plants and ensure they thrive in their new home.
First, it’s essential to carefully remove any existing plants from the raised bed. Gently lift them from the soil, being mindful of their roots, and place them in temporary containers or pots. Make sure to label each plant so you can easily reposition them later. Once your bed is empty, you can begin dismantling it by loosening the connecting screws or nails. Remember to save any soil, as it will provide important nutrients for your plants during the reinstallation process.
When it’s time to reassemble your raised garden bed in its new location, follow these tips for a successful transition. Start by securing the four corners of the bed, ensuring it is level and stable. Then, add fresh soil or a mixture of compost and existing soil, making sure to create a suitable environment for the particular plants you will be repositioning. Finally, carefully transplant your labeled plants back into the bed, being mindful of their specific needs for sunlight, water, and space. Don’t forget to water thoroughly after reinstallation to help your plants settle in their new surroundings.
To make the process even smoother, here are some handy features and tips to guide you through moving your raised garden bed:
| Features/Tips | Description |
|---|---|
| Bold currency | Remember to budget for any additional materials or tools you might need during the reinstallation process. |
| Increase plant spacing | Allow extra space between your plants in the new bed to ensure proper airflow and to account for future growth. |
| Protect delicate plants | If you have fragile plants, consider wrapping the root balls in damp burlap or newspaper during the move to protect them from damage. |
With these tips and features in mind, you’ll be well-equipped to move your raised garden bed to a new location and set it up for success. Happy gardening!
Frequently Asked Questions
Q: Can I give my raised garden bed a lift and transport it to a new location?
A: Absolutely! With a little bit of creativity and some teamwork, you can embark on an adventure to move your raised garden bed to greener pastures.
Q: What are the key ingredients for a successful garden bed relocation?
A: Patience, planning, and a dash of muscle power! Taking the time to assess your garden bed, gather the necessary tools, and enlist a helping hand will make the process a breeze.
Q: Any tips and tricks to ensure my raised garden bed’s safe journey?
A: Certainly! Remember to empty and recycle the soil, disassemble your bed, and protect fragile plants during the move. Don’t forget to label the components for easy reassembly and keep an optimistic spirit throughout. Happy gardening in your new garden bed oasis! As we bring this journey of moving a raised garden bed to a close, we hope you’ve found inspiration and excitement in the prospect of relocating your green haven. From carefully selecting the ideal spot to bidding farewell to your plants, we’ve navigated the twists and turns of this horticultural adventure together.
Moving a raised garden bed may seem like a daunting task, akin to transplanting treasured memories from one landscape to another. Yet, as we’ve discovered, with a dash of planning and a sprinkle of patience, you can uproot your cherished garden bed to create new horizons of growth.
Throughout this article, we’ve delved into the intricate art of disassembling, lifting, and transporting your raised garden bed with grace and ease. We’ve shared the invaluable wisdom of safeguarding your plants’ well-being, ensuring their secure journey to their new home. And we hope that as you read these words, you’ve imagined the whispers of your flowers, exclaiming their excitement for this thrilling journey ahead.
So, as you embark on moving your raised garden bed, we encourage you to embrace the unknown, the unpredictable, and the untamed world of possibilities. Let your hands dance in harmony with nature, choreographing a symphony of growth and transformation. Feel the warmth of soil beneath your fingertips as you tenderly nestle your beloved plants into their new abode.
Remember, a garden is a testament to resilience, adaptation, and the evergreen spirit of evolution. Moving a raised garden bed is not just about mere relocation; it is an act of nurturing growth, both for your plants and for your own soul.
In the canvas of life, let your garden bed be a vivid stroke of color, an oasis of serenity amidst the chaos. As you witness your plants flourish in their new surroundings, may your spirits soar, knowing that you have handcrafted a haven where life can thrive.
And so, dear gardener, as you venture forth armed with newfound knowledge and an unwavering determination, may each step be filled with excitement for what lies ahead. May the scent of blooming flowers fill your new garden, and may the beauty of nature unfold before your eyes as a living testament to the bonds between a gardener and their cherished plants.
Farewell, but not goodbye, dear reader, as your green thumbs continue to paint the world with life and wonder. May your journey be filled with bountiful harvests, dazzling blooms, and the everlasting joy that only gardening can bring.

- When to Put Weed and Feed on Lawn in Michigan - October 16, 2023
- When to Fertilize Potatoes Plants - October 16, 2023
- Can You Plant Clover in the Spring - October 16, 2023