Unraveling the mysteries of nature’s elements, we find ourselves entangled in the captivating world of fertilizer. A vital ingredient for flourishing gardens and bountiful crops, fertilizer plays an indispensable role in transforming seeds into plants of astonishing proportions. However, our well-intentioned efforts in nurturing the soil can sometimes be met with unexpected downpours, turning our once-dry fertilizer into a soggy mess. But fret not, dear gardeners! In this article, we delve into the art of drying out wet fertilizer, revealing the secrets that nature herself whispers, to restore this beloved ally to its powdery perfection. So, roll up your sleeves and prepare to embark on a fascinating journey where innovation meets cultivation – an adventure where waterlogged fertilizer meets its ultimate drying destiny.
Understanding the Importance of Drying Out Wet Fertilizer
When it comes to fertilizing your plants, it is essential to ensure that the fertilizer is dry and free from moisture. Wet fertilizer can be detrimental to the health of your plants and can even lead to their demise if not addressed promptly. is crucial for any avid gardener or farmer.
Why is drying out wet fertilizer important?
- Prevents nutrient loss: Moisture in fertilizer can cause the nutrients to break down or leach away, making them less effective in nourishing your plants.
- Prevents mold and bacterial growth: Wet fertilizer provides an ideal environment for the growth of mold and harmful bacteria, which can harm the plants and affect their overall growth.
- Improves absorption rate: Dry fertilizer is easier for plants to absorb through their roots, ensuring efficient uptake of essential nutrients for healthier and more robust growth.
- Enhances storage life: By drying out your fertilizer, you can extend its shelf life, ensuring that it remains effective for future use.
| Features | Tips |
|---|---|
| Easily absorbable by plants | Spread wet fertilizer in a thin layer on a tarp or drying rack to expedite the drying process. |
| Reduces the risk of fertilizer burn | If possible, avoid over-watering your plants while using wet fertilizer to minimize the chances of any potential damage. |
| Promotes better storage longevity | Avoid exposing dried fertilizer to moisture by storing it in airtight containers or sealed bags. |

Effectively Removing Moisture from Wet Fertilizer: Techniques and Tools
Moisture can be a common problem when dealing with wet fertilizer. The excess water content not only affects the quality of the fertilizer but also poses a challenge during storage and transportation. However, there are several effective techniques and tools that can help in efficiently removing the moisture from wet fertilizer.
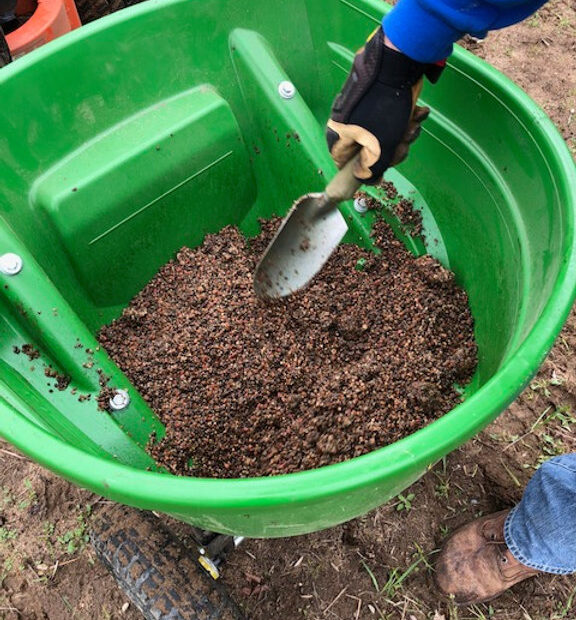
One reliable technique is air drying. Simply spread the wet fertilizer in a thin layer over a large surface area, preferably in a well-ventilated area with good sunlight exposure. This allows the moisture to evaporate naturally, enabling the fertilizer to dry out. It is important to turn and mix the fertilizer regularly to ensure consistent drying. Additionally, using fans or blowers can enhance the air circulation and speed up the drying process significantly.

Another useful tool to consider is a moisture barrier. These barriers act as protective covers that prevent moisture absorption, even in humid environments. They are usually made from heavy-duty plastic or tarp materials, designed to resist water penetration. By covering piles or storage bins of wet fertilizer with a moisture barrier, you can effectively shield it from external moisture and assist in drying out the fertilizer faster. Remember to securely seal all edges and corners of the barrier to maximize its effectiveness in keeping moisture at bay.
Below is a table highlighting some features and tips to effectively remove moisture from wet fertilizer.
table {
width: 100%;
border-collapse: collapse;
}
td, th {
border: 1px solid black;
padding: 8px;
text-align: center;
}
| Features | Tips |
|---|---|
| Air Drying | Spread the wet fertilizer in a thin layer for better evaporation |
| Blowers/Fans | Use fans to enhance air circulation and speed up drying process |
| Moisture Barriers | Securely seal all edges and corners for better moisture protection |

Guidelines for Safe and Efficient Drying of Wet Fertilizer
When it comes to wet fertilizer, drying it out in a safe and efficient manner is crucial to maintain its quality and effectiveness. Here are some guidelines to help you achieve the best results:
- Proper storage: Before you begin the drying process, ensure that the wet fertilizer is stored in a well-ventilated area. This will prevent the accumulation of moisture and help expedite the drying time.
- Spread it out: Spread the wet fertilizer evenly on a clean and dry surface. This will maximize the exposure to air and promote faster drying. Avoid piling it up, as this can create pockets of moisture and hinder the drying process.
- Monitoring moisture levels: Regularly check the moisture levels of the fertilizer using a moisture meter. Aim for a moisture content of around 10-15%, as this is ideal for safe storage and prevents the risk of caking or clumping.
In addition to these guidelines, here are some features and tips that can further enhance the efficiency of the drying process:
| Automatic temperature control: | Invest in a drying system with automatic temperature control to ensure that the fertilizer is dried at the optimal temperature. This prevents overheating and preserves the fertilizer’s nutrients. |
| Proper ventilation: | Ensure that the drying area is equipped with proper ventilation to allow for the circulation of fresh air. This helps remove excess moisture and speeds up the drying process. |
| Regular turning: | Periodically turn the drying fertilizer to promote even drying. This prevents the formation of lumps and ensures uniform moisture distribution throughout the product. |
By following these guidelines and utilizing the recommended features and tips, you can effectively dry out wet fertilizer while maintaining its quality, ensuring optimal results for your agricultural needs.

Preventing Wet Fertilizer and Strategies for Future Maintenance
Have you ever encountered the frustrating problem of wet fertilizer? Excessive moisture can render fertilizers less effective and even cause nutrient loss. But fear not! We’ve got you covered with some ingenious strategies on how to effectively dry out your fertilizer and maintain its quality for future use.
Let’s dive right into the various features and tips that will ensure you never face the hassle of wet fertilizer again:
| Proper Storage: | Avoid storing fertilizer in a damp or humid area. Opt for a dry and well-ventilated storage space to prevent moisture accumulation and maintain its quality. |
| Absorbent Materials: | Should you find your fertilizer damp, add moisture-absorbing substances like sawdust or rice hulls. These materials will help absorb excess water, making your fertilizer dry and ready for use. |
| Re-sealable Containers: | Ensure that your fertilizer is stored in air-tight containers. This will prevent any moisture from seeping in and keep the fertilizer dry and usable for extended periods. |
Remember, maintaining the quality of your fertilizer is crucial for optimal plant growth. By employing these preventive measures and implementing the tips mentioned above, you’ll be equipped to keep your fertilizer dry and effective throughout its lifespan.
Frequently Asked Questions
Q: Why did my fertilizer get wet in the first place?
A: Oh, Mother Nature can surprise us sometimes! Perhaps a heavy rainstorm decided to douse your precious fertilizer, or maybe an overexcited garden hose got a bit carried away. Regardless, accidents happen, and now it’s time to fix it.
Q: How can I dry out my waterlogged fertilizer?
A: Fear not, for there is hope! First, spread out your fertilizer on a flat surface or a tarp in a well-ventilated area. Allow the fresh air and warm sunlight to work their magic. If the sun is shy that day, fret not! You can use a fan or even a gentle breeze from the countryside to aid in the drying process. Just make sure to give them a good stir occasionally.
Q: Can I speed up the drying process for my fertilizer without compromising its quality?
A: Utilize your inner superhero and expedite the drying process! If you’re in a rush, try placing your damp fertilizer in a warm oven at a low temperature. Keep a watchful eye and don’t let that superhero power turn into a supervillain disaster! Remember, our goal is to dry, not to toast! Patience is the virtue of a seasoned gardener, so if time allows, stick to the natural drying process to maintain the best quality for your fertilizer.
Remember, drying out wet fertilizer is an art form, so be vigilant, creative, and adaptable. May the gods of green thumbs guide you on this life-changing journey! As we bring this journey to a close, we have ventured into the world of fertilizer mishaps and discovered the solution to an all-too-common problem. While the elements may conspire against us, turning our once-clumpy fertilizers into soggy quagmires, fear not, for there is hope to be found in the art of drying.
Throughout this article, we have explored the various techniques and methods that can be employed to rescue our beloved fertilizers from their moisture-laden doom. With a touch of creativity, a dash of patience, and a sprinkling of ingenuity, we can restore these essential nutrients to their pristine, dry form.
Just like a master chef adjusting the flavors, we have discovered the importance of balance within the drying process. Whether it be utilizing natural sunlight, harnessing the gentle power of fans, or even employing the deceptively simple yet effective rice absorption method, we have explored a cornucopia of options to suit every gardener’s needs.
It is a humbling journey, for even the most seasoned horticulturists can fall victim to the perils of wet fertilizer. Yet through our trials and tribulations, we have emerged enlightened, armed with the knowledge to ensure our gardening endeavors remain fruitful year-round.
But let us reiterate the importance of safety. While we strive to dry out our fertilizers with the utmost care, it is vital to remember the potential risks involved. Always handle chemical fertilizers with caution, wear appropriate protective gear, and follow the recommended guidelines provided by the manufacturers.
As we bid farewell to this exploration of moisture-ridden obstacles, may your future gardening endeavors remain dry and bountiful. With newfound knowledge firmly planted in your horticultural toolbox, fear not the rain-soaked soil or accidental water spills. Instead, face them head-on, armed with the expertise to restore your fertilizers to their rightful state of dry, crumbly perfection.
So go forth, fellow gardeners, and may your fertilizers never languish in their soggy slumbers again. Let the winds of knowledge sweep away the dampness, leaving behind only the promise of thriving plants and a garden lush with abundance. Until we meet again, happy drying!

- When to Put Weed and Feed on Lawn in Michigan - October 16, 2023
- When to Fertilize Potatoes Plants - October 16, 2023
- Can You Plant Clover in the Spring - October 16, 2023
Contents