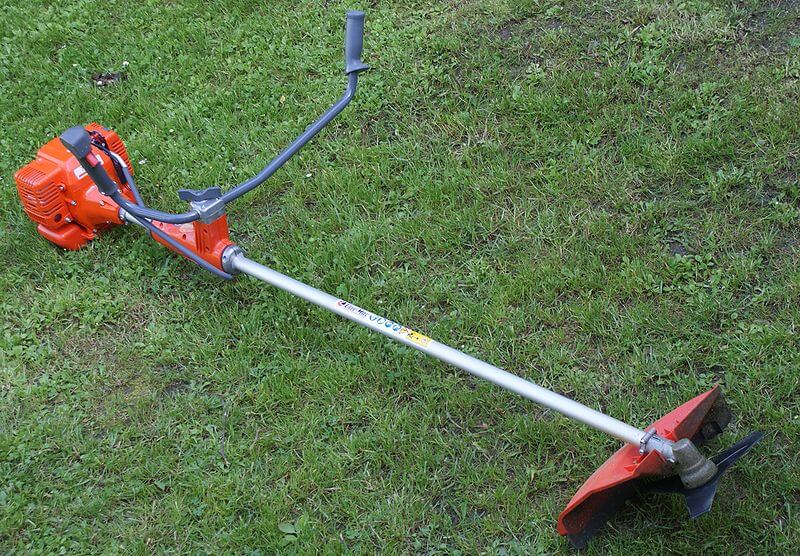
Unruly weeds have a way of infiltrating every nook and cranny of our beloved gardens, refusing to be tamed. But fear not, fellow garden enthusiasts, for the mighty weed eater is here to rescue our outdoor havens from these unruly invaders. Alas, just like any hero, our trusty weed eaters too require occasional care and attention to keep them performing at their best. In this humble guide, we shall embark on a cleaning journey, exploring the depths of maintenance and unveiling the secrets to ensuring our weed eaters remain in pristine condition. So, grab your overalls, put on your gloves, and prepare to embark on a cleaning escapade like never before—a journey that will breathe new life into your weed eater and empower you to conquer those stubborn weeds once and for all. Let the cleansing commence!

Preparing for Cleaning: Gather the Necessary Tools and Materials
In order to effectively clean your weed eater and ensure its optimal performance, it is important to gather all the necessary tools and materials beforehand. These items will help you in the cleaning process and make it easier for you to maintain your weed eater in the long run. Here are a few essential tools and materials that you should have on hand:
-
Safety gear: Before you begin cleaning your weed eater, it is crucial to prioritize safety. Ensure you have safety goggles, gloves, and a face mask to protect yourself from any potential debris or chemicals.
-
Cleaning solutions: Depending on the level of dirt and grime on your weed eater, you may need different types of cleaning solutions. Common options include soapy water, vinegar solutions, or specialized degreasers. Have these solutions available to loosen and remove any built-up dirt.
-
Brushes and toothpicks: To thoroughly clean the different components of the weed eater, you will need brushes with stiff bristles. These brushes will help you reach the nooks and crannies where dirt may accumulate. Toothpicks can also be useful in removing any clogs or debris from hard-to-reach areas.
-
Cloth or paper towels: Having a soft, absorbent cloth or paper towels on hand will allow you to wipe down and dry off the weed eater after cleaning. This will help prevent any water or cleaning solutions from seeping into sensitive parts and potentially damaging the equipment.
In addition to these essential tools and materials, here are some features or tips to keep in mind when preparing for cleaning your weed eater:
| Features/Tips |
|---|
| Replace worn or damaged parts |
| Check fuel and oil levels |
| Clean air filters regularly |
Taking the time to gather the necessary tools and materials and understanding the essential features or tips will ensure that your weed eater stays in peak condition. Cleaning it regularly not only promotes its longevity but also ensures that it operates efficiently, providing you with a hassle-free experience the next time you need to tackle your yardwork.
Frequently Asked Questions
Q: How can I transform my weed eater from grungy to gleaming?
A: Fear not, for we have the ultimate guide on how to clean your weed eater like a wizard!
Q: What celestial tools shall I gather to conquer the dirt and grime on my trusted weed eater?
A: Gather your wand (a soft brush), a vial of enchanted soap, a goblet of water, and the magical powers of patience!

Q: Are there any extraordinary tips that can help me unleash the full potential of my weed eater’s cleanliness?
A: Absolutely! Remember to chant the sacred mantra of “safety first” by detaching the power source and guarding your hands with gloves. Focusing your wizard-like attention on the delicate parts will ensure that not a speck of dirt remains. Lastly, don’t forget to offer appreciation to your weed eater for its valiant efforts! As we wrap up our journey through the intricate world of weed eater maintenance, we hope you now feel equipped and empowered to conquer the battle against those unruly weeds. Remember, a clean weed eater not only ensures a more efficient cutting experience but also prolongs the life of your trusty gardening companion.
So next time you find yourself knee-deep in dandelions, tangled in thorny vines, or surrounded by pesky overgrowth, don’t fret! Armed with the knowledge acquired here, you have the power to tame any wild yard and restore order to your little green kingdom.
We’ve explored the essential steps to keep your weed eater spick and span: from safety precautions to disassembly, delicate cleaning techniques to the art of reassembly. All these efforts not only restore your weed eater’s metallic brilliance but also unleash its full potential on your battlefield of weeds and unwanted foliage.
Now, as you embark on your cleaning ventures, remember to approach each task with patience and precision. Take pride in meticulously removing debris, giving your weed eater the tender loving care it deserves. Immerse yourself in the therapeutic rhythm of assembly, relishing in the satisfaction of a job well done.
And if at any point you find yourself facing a conundrum or a stubborn bolt, fear not! There’s a wealth of online forums, expert advice, and fellow gardeners ready to lend a helping hand. For in this era of connectivity, knowledge flows freely, connecting green-thumbed enthusiasts across the globe.
So go forth, dear reader, armed with your newly acquired cleaning prowess. May your weed eater forever run smoothly, effortlessly gliding through the toughest of green adversaries. May your garden bask in the glory of a perfectly manicured landscape, a testament to your dedication and symbiotic relationship with your trusty weed eater.
Remember: clean well, cut well, and weed on!

- When to Put Weed and Feed on Lawn in Michigan - October 16, 2023
- When to Fertilize Potatoes Plants - October 16, 2023
- Can You Plant Clover in the Spring - October 16, 2023